Get familiar with the API with Postman
Postman is a great tool for developing API's, but it also works really well for playing with existing API's, testing out different requests, and reviewing responses. We've built a collection of requests you can use in Postman to get more familiar with the API, how it works and what the requests and responses look like.
Requirements
If you don't have a Foxy store yet, you can sign up for one at foxycart.com. It's free!
You'll also need to get Postman installed on your system, you can download it from their website at getpostman.com. While they have a Chrome plugin available, we'd recommend using their desktop app.
Setting up Postman
Once you have Postman installed, click the following button to import our example collection into Postman:
You can also import the collection manually in the app by clicking the "Import" button in top left. Select "Import from link", paste in this link: https://www.getpostman.com/collections/eeb11db71b93c99b2168 and click "Import".
With the collection imported, we now need to create an OAuth integration for your store, and set up an environment in Postman to store those credentials:
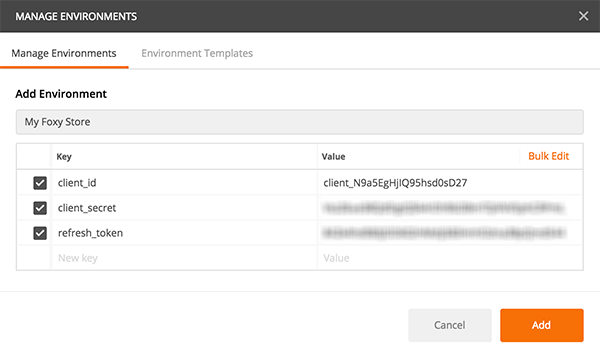
- In Postman, click the "New" button and select "Environment". Give it a name of the store that you'll be utilising with the API.
- Create three keys for
client_id,client_secretandrefresh_token. - Login to the FoxyCart administration, select the store you want to use with the API, and go to the "Integrations" page.
- Under "Current Integrations" click the "Get Token" button, complete the two fields that appear for name and description (for example "Postman Client" and "Trying out the API with Postman") and click "Create Integration"
- On success, you'll see some credentials for your new OAuth client. Copy and paste the values for
client_id,client_secretandrefresh_tokeninto the matching environment variables you created in Postman in step 4. - Click the "Add" button to create the environment, and close the "Manage Environments" panel.
- In the top right area of Postman, in the environment dropdown (it will probably show "No Environment" by default), select the environment you just created.
You're now all set to start interacting with the Hypermedia API in Postman!
Generating an Access Token
An important aspect for actually communicating with the API though is through the Access Token. That token acts as your password for accessing the protected resource - in this case, your store. When you created the integration in the steps above, one was included in the response, but we didn't copy that over.
As a quick test, try to execute the "Store Home" request within the "Home" folder. As there isn't an Access Token set, the request will fail with a status code of 401 and an error returned in the body that it's an invalid token.
To generate the Access Token we need, we'll use the API to create one using the Refresh Token we saved in the environment. Open the "Refresh Access Token" request within the "OAuth" folder, and send the request. You should see a JSON response showing the new access token. The "Refresh Access Token" request will automatically put that new Access Token into your environment, and it will be used for subsequent requests. You can look at the "Tests" tab of the request to see how we're setting the Access Token to your environment.
Access Tokens only last for 2 hours, so you'll need to re-run the request whenever it needs to be refreshed. Similar to when running the request without an Access Token above, you'll be able to tell from the response if the Access Token is no longer valid and needs to be refreshed.
You'll likely want to automate (in your integration) refreshing the Access Token if it has expired. Your application could catch the particular response code (401) to trigger a refresh of the Access Token, then a re-attempt of the original request. If you're using an OAuth library, it may handle this for you automatically. You can see additional information on refreshing the token here.
Interacting with the API in Postman
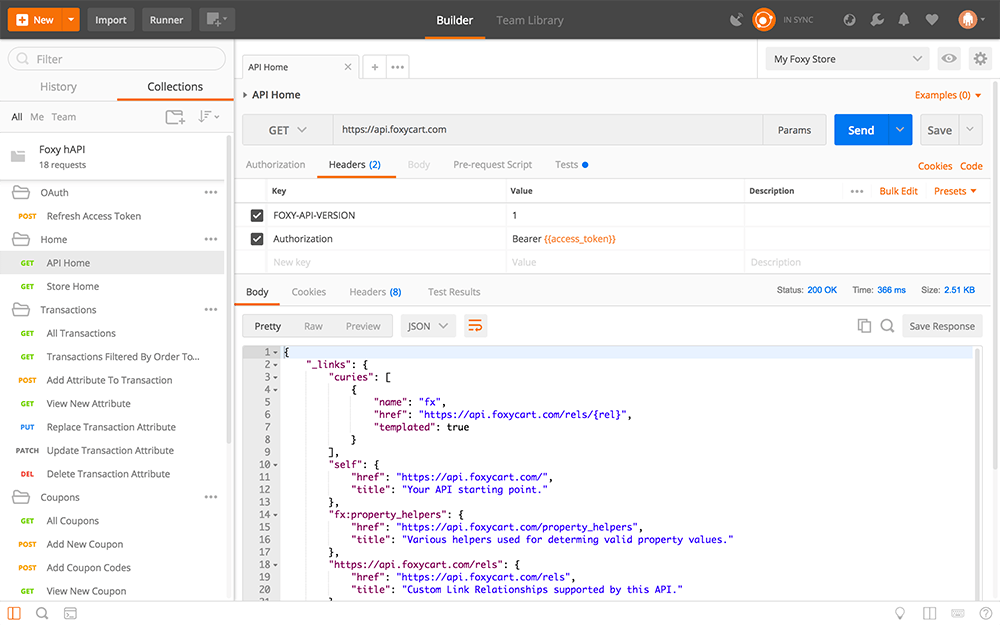
With your Access Token set, you'll now need to access the API home to cache the URI to access your store. To do that, within "Home" run the "API Home" request. This will use the new Access Token within the Authorization header and on success, cache the URI for the store in the environment.
Next we'll cache some more useful URI's, like for transactions and coupons. Run the "Store Home" request, which will use the store URI we just cached, and will return information about your store as well as URI's for all aspect of your store, which you can see in the response body.
At this point you can start running some of the other requests in the collection to see how interacting with API can work. The requests are generally ordered in the way you'll want to run them, and show examples of getting, filtering, updating and deleting resources.
Caching
Caching URI's is an important aspect of working with a Hypermedia API and optimizing your integration. To see how we're approaching this idea in Postman, you can review the "Tests" tab of the different requests, which will have a blue dot if we're doing something (like "caching" URIs in the environment) after requests are run. You can also read more about how to approach caching in your own integration on the documentation here.
Continuing Your Explorations
You can also go beyond our example requests and create your own. Postman supports clicking links within the response body, and, to make that even more useful, you'll want to ensure that "Retain headers when clicking on links" is turned on in the "General" tab of Postman's preferences. This will include the version and authorization headers from the previous request with your new one automatically.
Hopefully seeing requests and responses with Postman helps you better understand our REST Hypermedia API!